Fluorescent Efflorescence
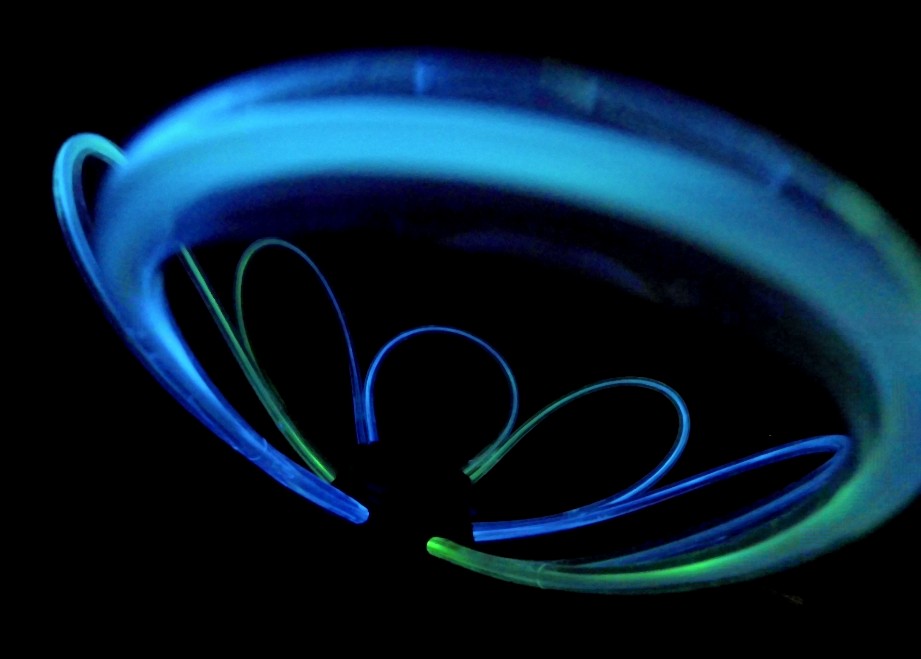

This is an idea I had for a child’s night light that would sit on a dresser, or could plug into a wall. The light output intensity can be adjusted via a central knob posing as the flower’s center, and I can envision incorporating multiple color combinations for the pedals to market towards boys and girls. In addition to this younger audience however, this product could also be marketed towards an older high school/collage audience with the ‘music pulsing’ option, where the entire flower lightly pulses to the beat of background music. I could see something like this adding a neat dimension to a bathroom night light during a party.
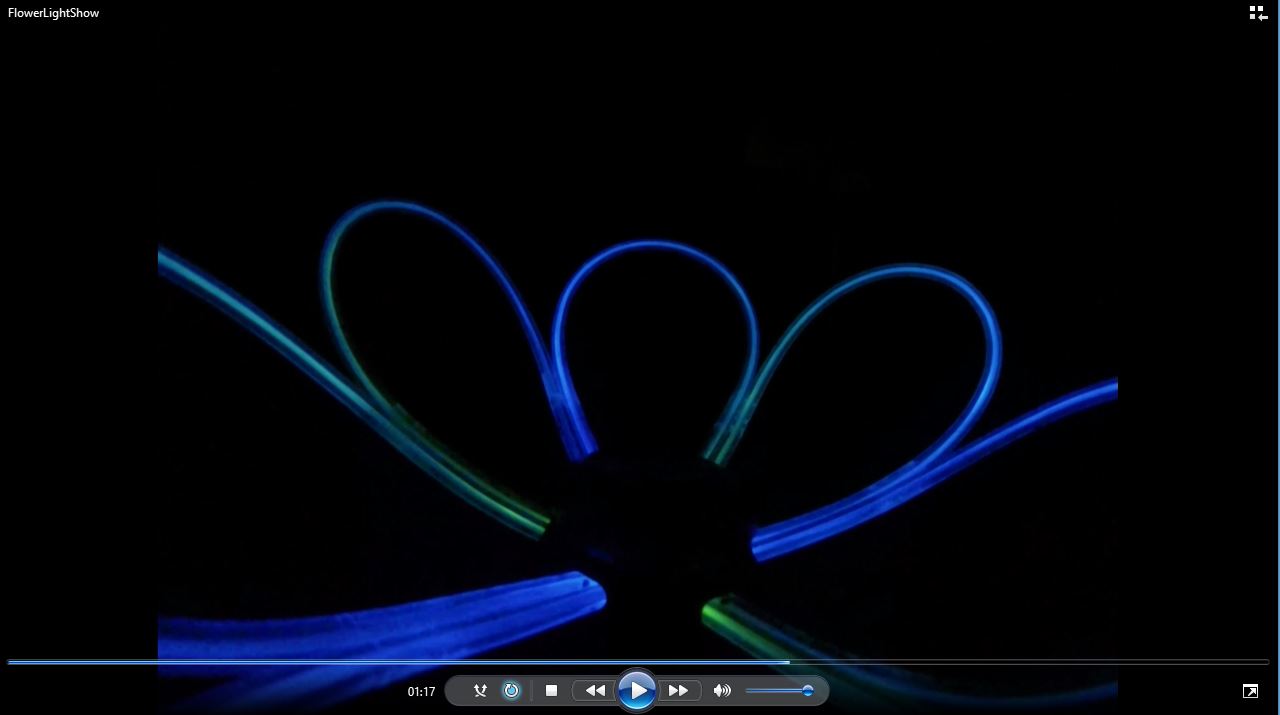
Click on the video below to see my initial functional prototype!
If I’ve managed to capture your attention and you want to learn a little more in depth on my thought process’ going into this project, and how it was born, awesome! Keep reading!
This project was born as a present for my brother who recently returned from Afghanistan. I wanted to create something that combined music with a cool new light source that wasn’t already prevalent in the consumer market. In addition however, because it was going to be a present I also wanted to add a degree of functionality to the design. As usual, I started the process with a brainstorm session between me, my sketchbook, and my pencil.
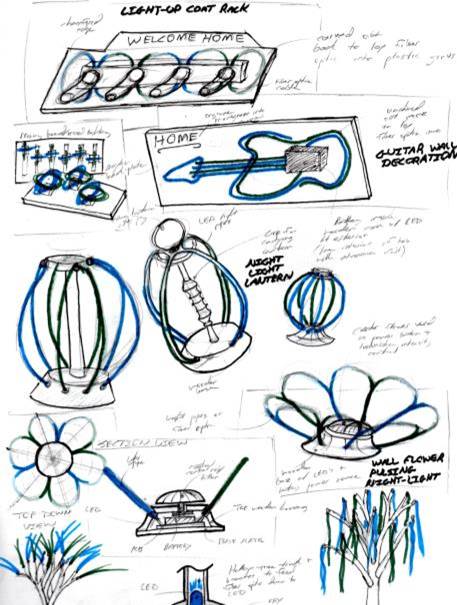
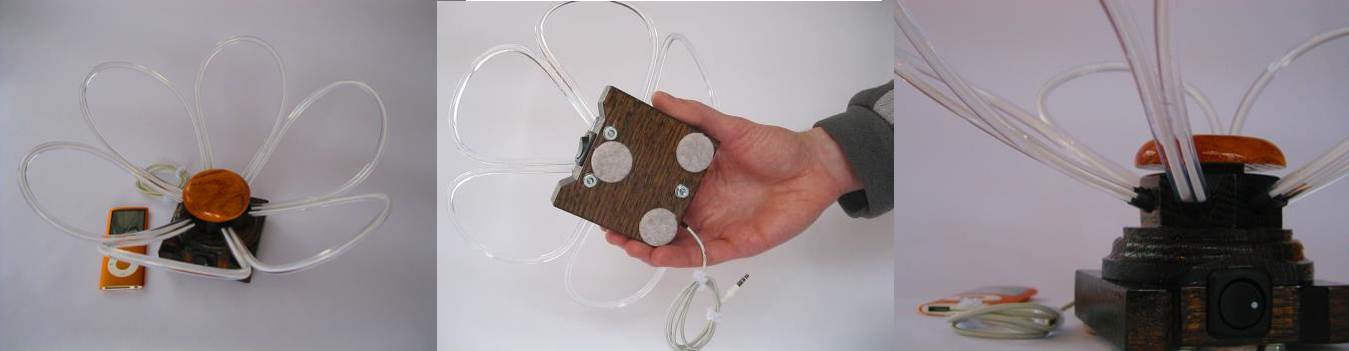
I ended up deciding to build a ‘strobe flower’. Theoretically I could steal an auxiliary cord from some old iPod headphones, amplify the signal with a transistor, then use that amplified signal to power a series of parallel LED’s taped to light pipes, which could then be bent to my desired shape. This provided me with a ‘fun’ music interface. In addition to this, if I short circuited the transistor with a switch and potentiometer, the flower could then become a night light, with adjustable brightness intensity.
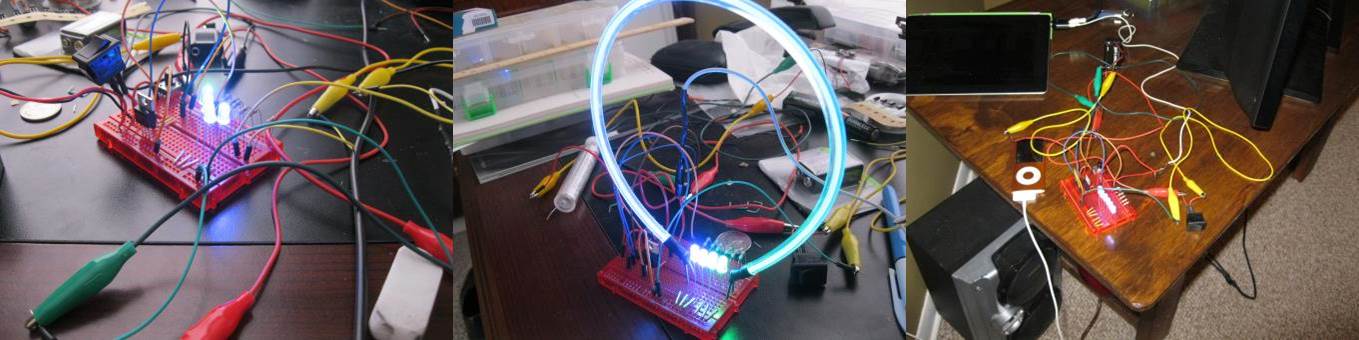
Because I’m no electronics wiz, I started the process by making an electrical prototype to ensure I could actually create what I envisioned. The following pictures illustrate this first step.
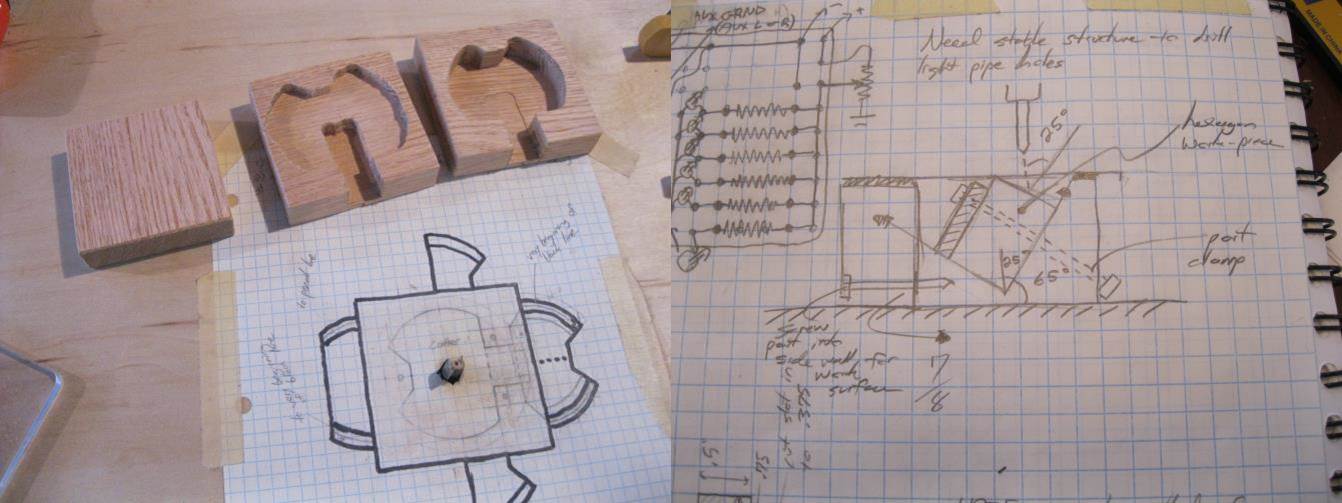
After my electrical challenge was conquered, I started in on the building portion. Because I don’t have a 3D printer in my basement, I decided to router out a series of wooden layers that would be glued together to make the final base. This was a great learning experience since I had never routered anything before.
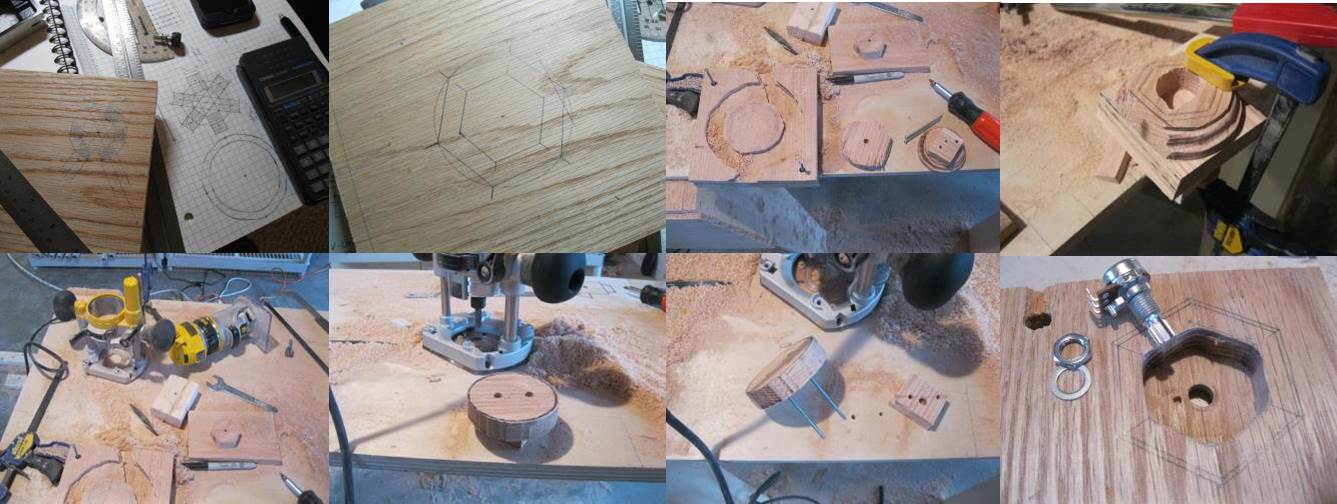
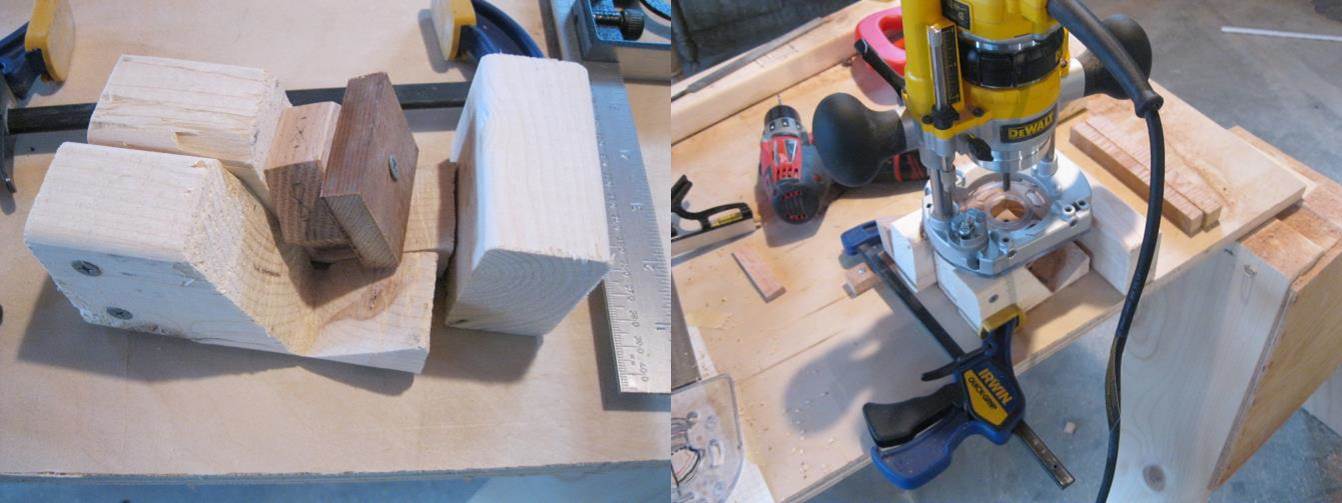
In addition, after some thinking I realized some of my parts needed to be routed out upside-down, which presented it’s own challenges due to the relatively intricate interior portions. I ended up mapping out where the part would move relative to the machine bit to track my progress. It took a couple iterations to get the process down. Also, because I do not have access to fancy wood-working tools, I had to build a make-shift drill press to drill the light pipe openings at approximately 25 degrees off vertical to form ‘upward tilting pedals’ off the center. These are pictured below.
Once I had all the woodworking finalized, I put several layers of stain and polyurethane on the base. Then, to maintain a lighter ‘flower center,’ I opted to skip the stain for that specific part, and polyurethane the bare wood. I also used a perf board to solder the electronics into a semi-permanent layout.
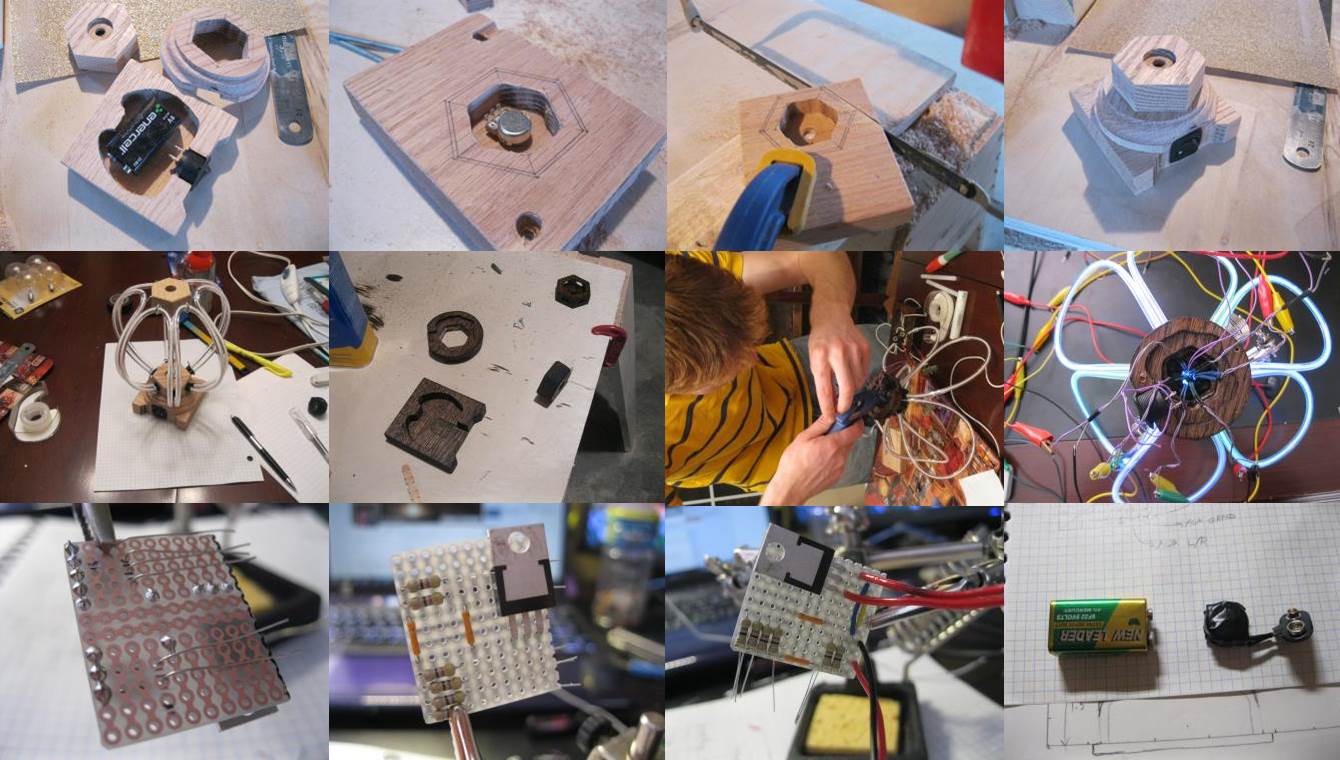
Also, unfortunately my original plan to use a conventional 9V battery was foiled due to lack of space in the base. To remedy this I made my own 9V battery from three 3V coin batteries wired in series. I soldered leads onto the ends, wrapped it in tape, and VUALA! I plugged it into the original 9V battery connector soldered into my perf board.
Lastly, I took bunch of pictures of it, then put it in a box and said goodbye! It now resides at my brother’s house to this day. Cheers and many thank you’s to all our brave soldiers protecting our beloved country.

Copyright © Scott Fisher
Leave a Reply